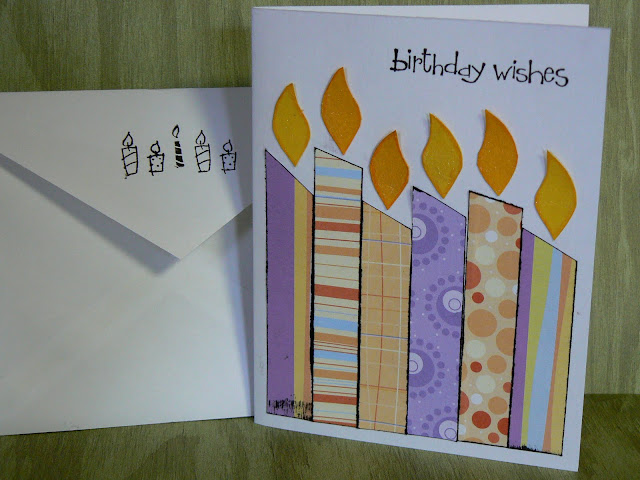
Also, today is my brother-in-law's birthday! And while I make cards all the time, I am NOTORIOUS for never actually mailing them out... So Jeff is not getting a birthday card today, instead I am posting some birthday cards on my blog for you to see! Happy Birthday, Jeff!!! He doesn't read my blog, so he will never see this anyway, unless I tell my sister! :)
I made this card back in June... now that I think about it, I posted about birthday cards on my sister's birthday too... aren't I original? anyway, I made this card

My mom requested some last week, but she wanted some different colors, so I got to work creating some for her and some to add to my Whimsical Words Shop. For some reason the paper I had on hand didn't lend to super creativity and I ended up with blue/green and pink/green as my other options, so hopefully she has some men and women to send birthday cards to. I have never been very good at taking pictures of my process, but I thought I would try to walk you through some of the steps in case you like the card ... or you can just go to my shop and buy the purple ones, or the pink ones, or the blue ones!
The first step is the candle flames. I hand cut a TON of little flames from different shades of yellow paper. I accent the edges of the flame with colored pencil (orange) and then spray all the flames with glimmer mist to make them sparkle! This took forever, but I just love the effect it gives!!
Then I pick 4-5 sheets of scrapbook paper that coordinate and start cutting strips (about 3/4 inch wide). Then I cut them into various lengths (Longest is 4 1/4 inches, shortest about 2 1/2) and then I mix them all up for different cards, so each card is unique! I take a black inkpad and rub the edges of the paper to accentuate them better on the card ... like I said, a lot of hands on work!

after that, I hand stamp the sentiment and add little stamped candles inside the card and on the envelope to coordinate it all together!


I just love the finished look. What colors would you use for a birthday card?
and I am linking up to a few crafty parties!!


No comments:
Post a Comment
I would love to reply to your comments, but I can't unless you have an email available in your profile!